目录
显示

一般挂载Google Drive的时候,默认是使用的官方提供的api,所以高峰期上传文件的时候,由于很多人在用,导致api的流量上限,会出现各种403,ratelimit等错误,最常见的报错提示为:Failed to get file: googleapi: Error 403: Rate Limit Exceeded, rateLimitExceeded,然后目前的解决方法就是使用自己的api。
随着时间推移,方法可能会出现变动,方法仅供参考。
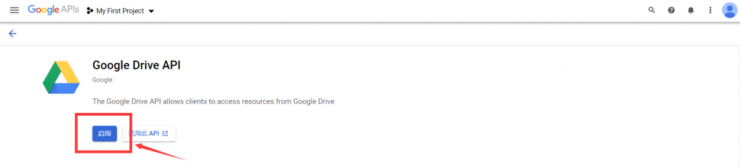
一、启用Google Drive API
先启用Google Drive API,启用地址:点击进入 点击启用
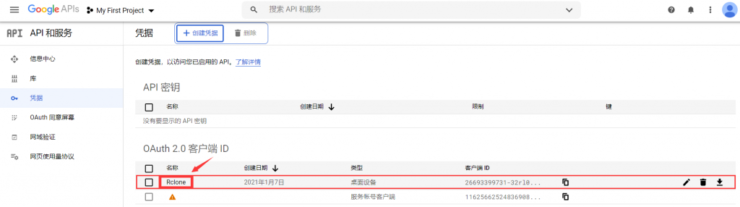
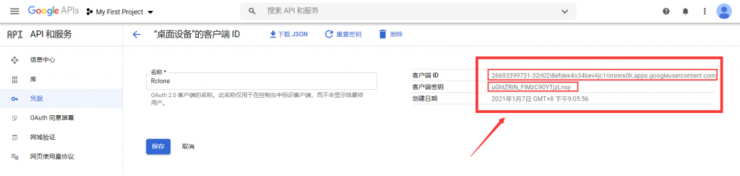
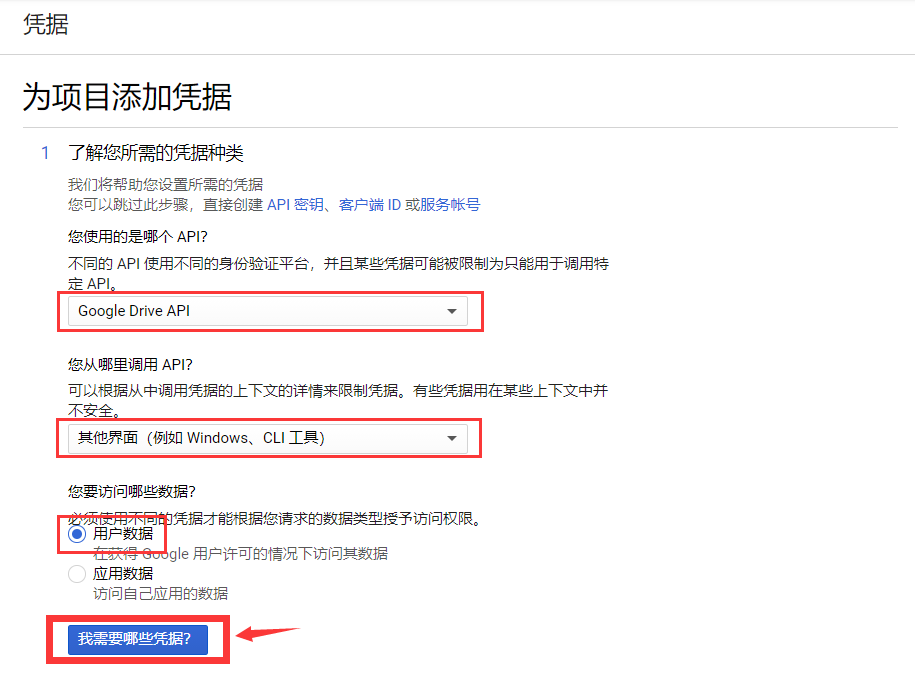
二、创建凭证
看图设置?
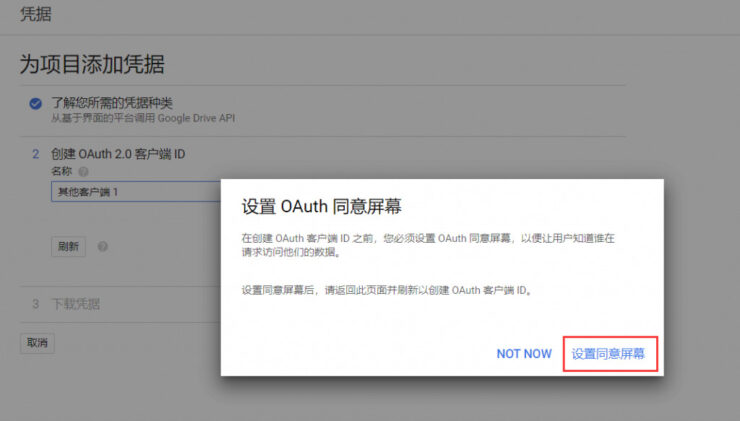
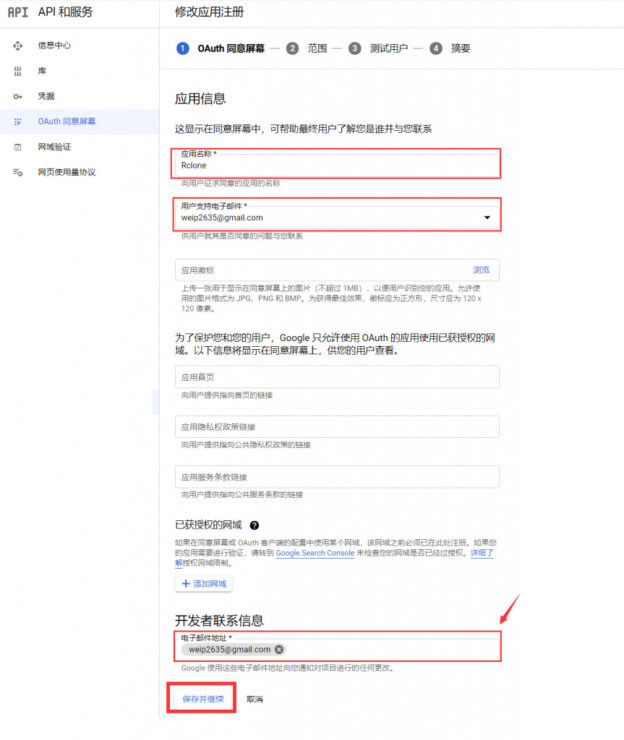
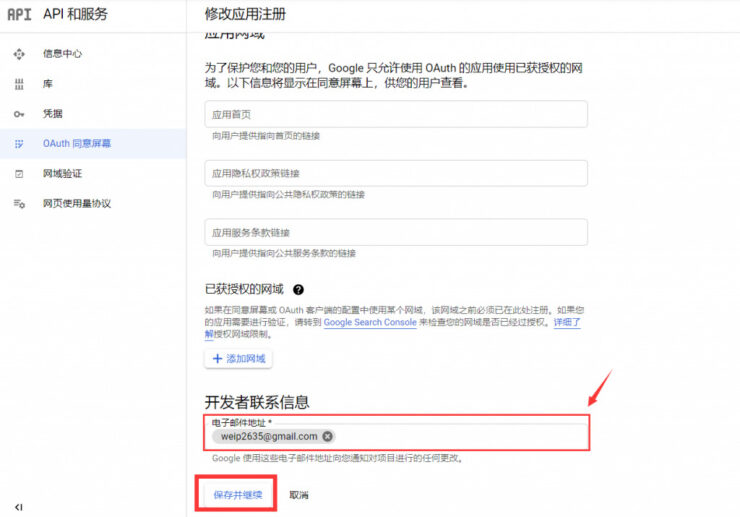
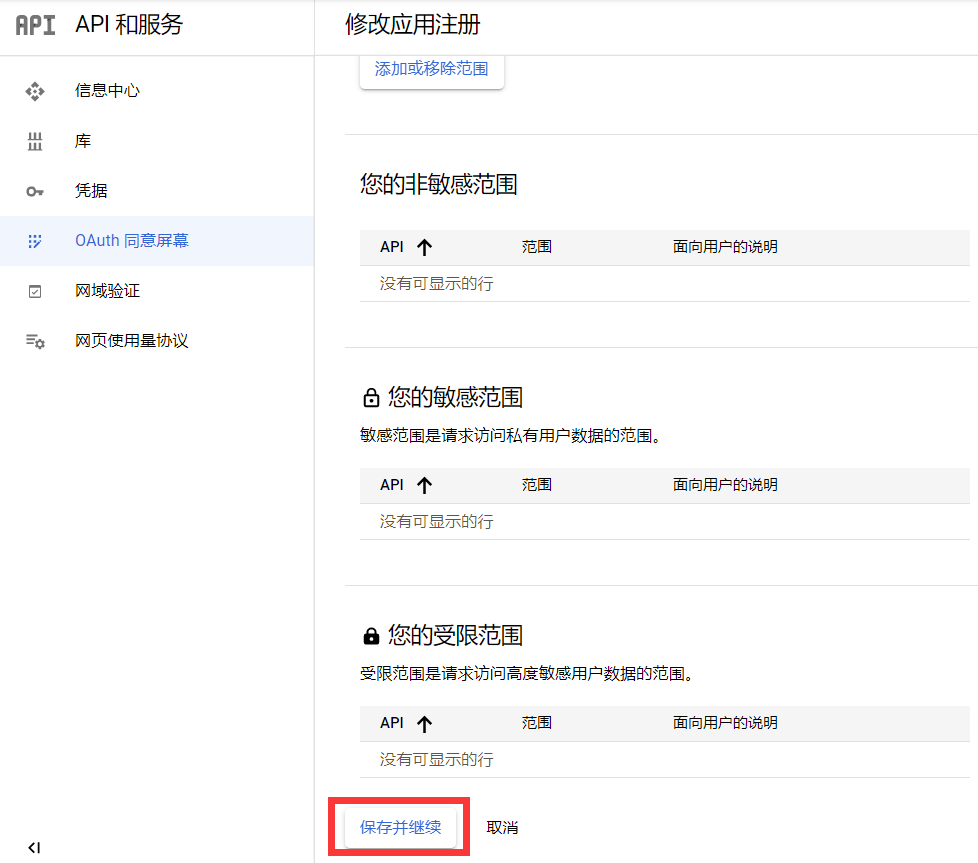
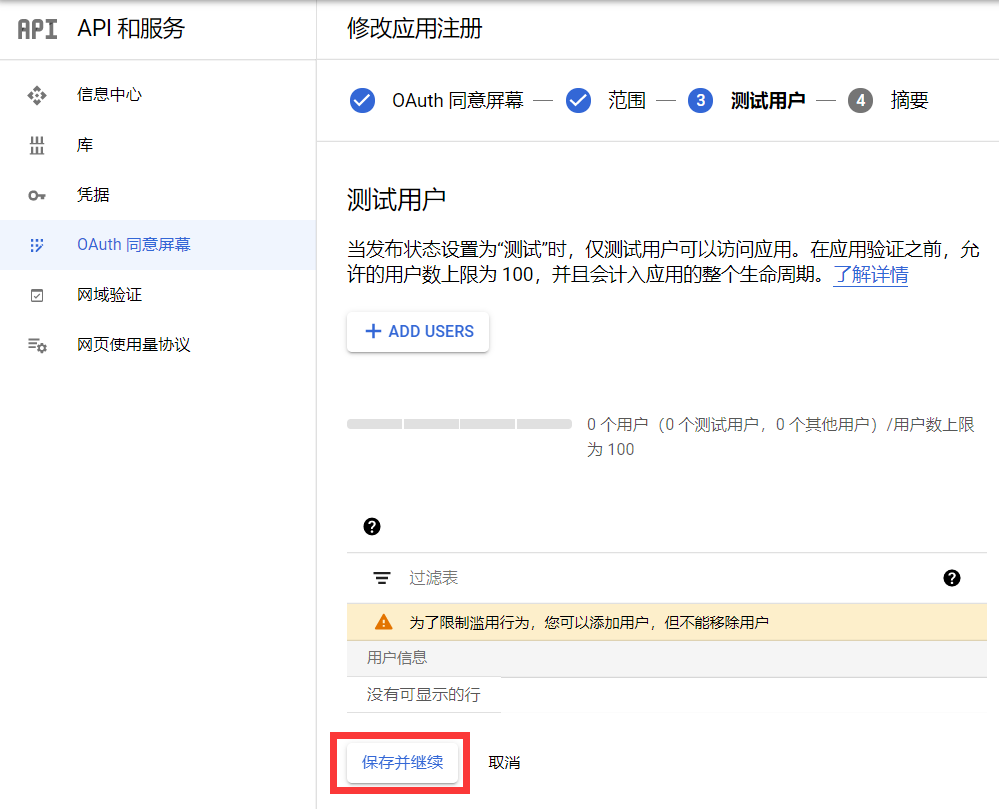
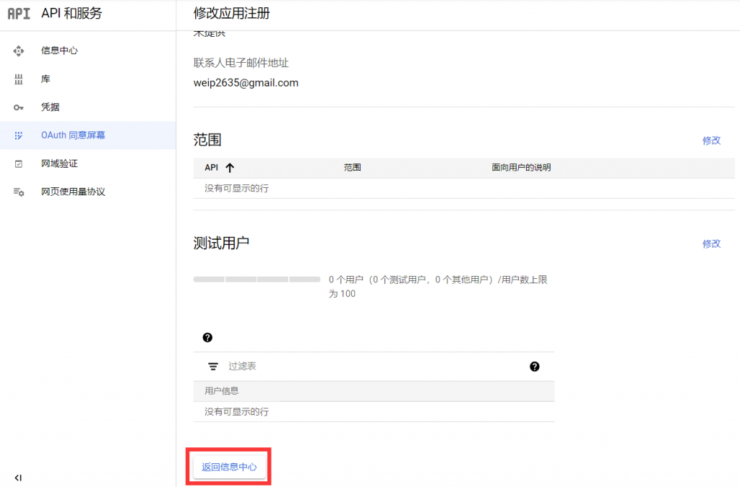
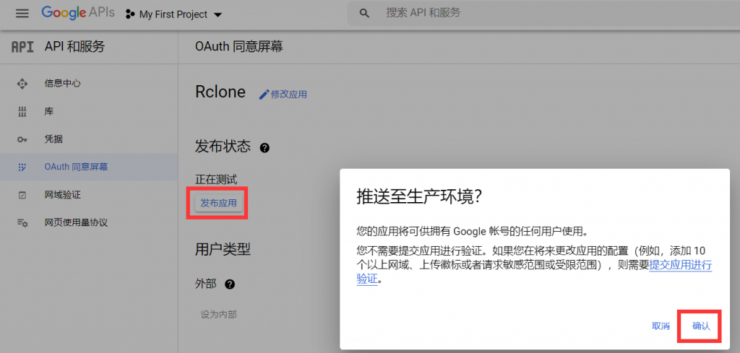
三、设置同意屏幕
目前是【凭证】界面,点击【设置同意屏幕】会跳转到新的界面,注意等一下要回到这个界面
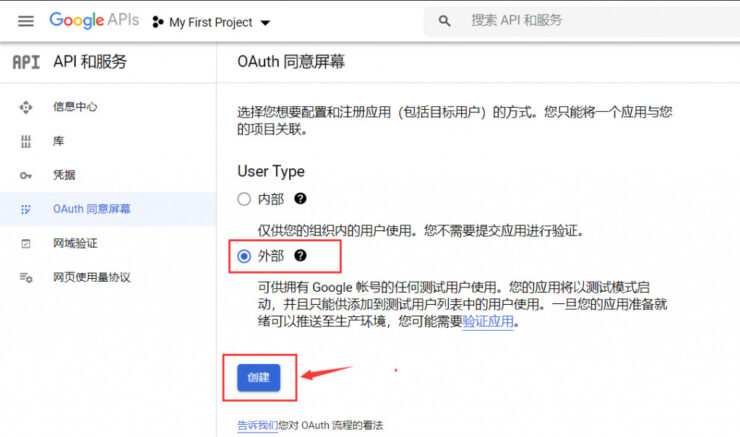
看图设置? 带*的项必须填
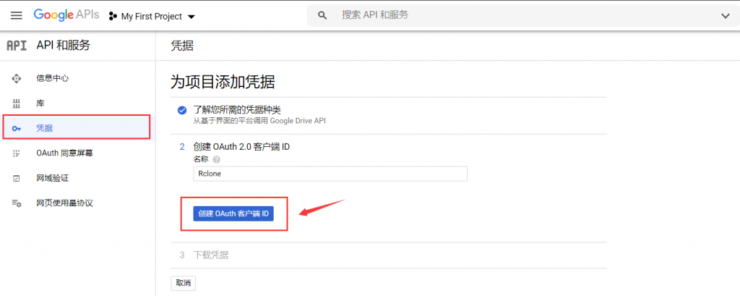
四、添加凭证
回到【凭证】界面开始设置,如图设置
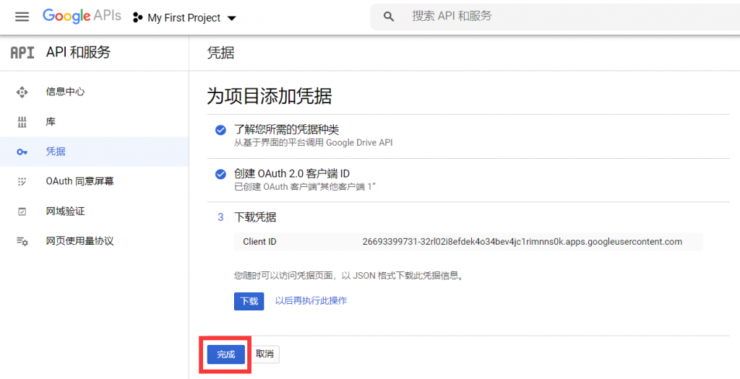
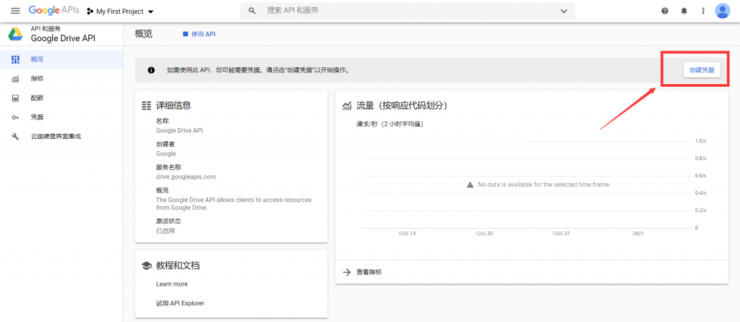
五、查看Google Drive API
【凭证】界面看到刚才创建的Google Drive API